By Joe Ketterer, Director of Quality and Efficiency
 Turf renovation—comprised of a properly timed sequence of operations like aeration, topdressing, and over-seeding—helps increase turf health and viability. This process takes place in late summer or early fall when air temperatures are cool, but soil temperatures are still warm. There are a variety of reasons why we may suggest a turf renovation to address deficiencies in a portion of the property or in some cases the entire area of turf, including but not limited to:
 Poorly established turf at initial installation
- Loss of density due to drought, insects, or disease
- Infestation of weeds and undesirable grasses
- Excessive foot traffic or construction damage
- To introduce new turfgrass varieties which can better withstand environmental stress
By this time in the fall season, most of our turf renovation operations will have been completed. Now, it’s our job to make sure we get the best return on our customer’s investment and increase the chances of having good germination and development of the newly seeded grasses.
So, what can we do to ensure success?
 Water— Be aware of natural rainfall amounts as well as irrigation levels and adjust as needed to keep the seed bed moist but not oversaturated to avoid seedling mortality. A good rule of thumb is:
- For the first four weeks: less water, more frequently
- After four weeks: more water, less frequently
- Mow— Just because the grass is new doesn’t mean it shouldn’t be cut as needed, however we need to be mindful of a few things:
- Start with a higher cutting height to avoid damaging the new seedlings.
- Avoid leaving excessive clippings—or leaves, if later in the season—because they can smother seedlings and deprive them of access to oxygen, sunlight and moisture.
- Downsize equipment where necessary to avoid damage from the weight and turning of heavy machines, which may tear up the turf and destroy seedlings leaving an unsightly bald spot.
- Fertilize— Treat the new turf in accordance with soil test results and prevailing nutrient management laws, with a complete starter fertilizer that should be applied at same time as the seeding OR a fertilizer with post emergent weed control only if necessary (allow a minimum of 4-6 weeks during which the seedlings have been mowed 2-3 times before using herbicides).
- Protect— Ask the client for help in keeping any vehicles and equipment off the turf and reducing foot traffic to a minimum.
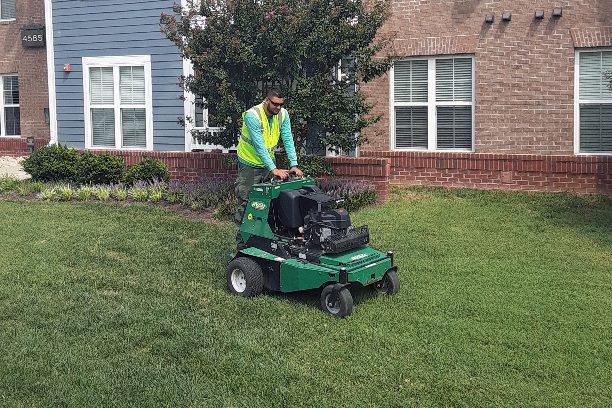
Pictured right: A new type of stand-on aerator that is faster and creates less fatigue for the operator.
Why do some turf renovations still fail?
 If a turf renovation was completed by the book, and the aftercare program followed correctly, and the seeding still fails to produce a healthy stand of turfgrass, then the problem most likely lies in the soil.
The importance of soil testing and maintaining the proper balance of soil chemistry cannot be overstated, as it is a key component to the success of basic aeration and overseeding operations. A soil test, which should be performed in mid-summer, provides valuable information, including nutrient levels (phosphorous and potassium are crucial to seedling development); pH level (ideally between 6.0 and 7.0); and Cation Exchange Capacity (CEC), which is essentially a measure of the soil’s ability to attract and hold nutrients.
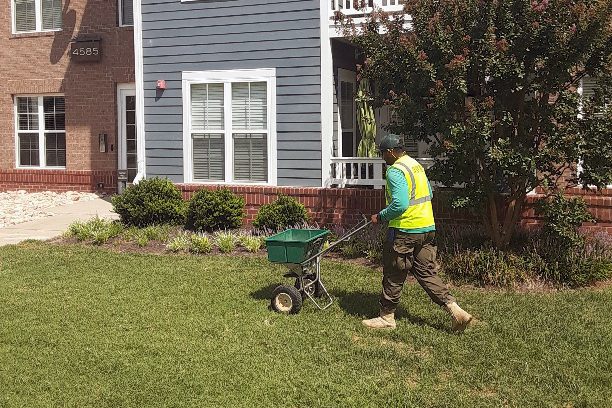
Pictured right: Using a high-wheeled stainless steel spreader with guard for proper broadcast seeding.
Too often in our industry, this important step is overlooked because of the time it takes to get results and recommendations back from an appropriate and dependable soil testing lab. The actual cost of the test is insignificant when compared to the cost of a failed turf renovation. Additional nutrients, fertilizer, or organic matter may be added to the newly seeded area after turf renovation to try to address soil chemistry concerns, but really these should be done in late summer before renovations begin. The ideal solution, as we often say, is to do it right the first time and begin with the end in mind!
 Poorly established turf at initial installation
 Water— Be aware of natural rainfall amounts as well as irrigation levels and adjust as needed to keep the seed bed moist but not oversaturated to avoid seedling mortality. A good rule of thumb is: